#wasteswap 2. DIY Toothpowder and a Bamboo Toothbrush

As you will know, we have recently started swapping out disposable items for reusable, toxin free, waste free, healthier alternatives in our home. To make the most of what we have and maintain some sort of house-hold budget, we’ve been replacing things as they have run out. Although, I’d love to overhaul everything in one fell swoop, we all know that’s not realistic, practical or really making the most of what you have. For me, it makes more ‘sustainable sense’ to use up what you have and make a better choice next time.

Unfortunately for us, one of the first items we were about to run out of was toothpaste! Tom nearly caved and thought about sneaking in a quick trip to the shops to buy a tube before I noticed – but he stayed strong and trusted my DIY toothpaste wish.

From the reading I’ve done, toothpaste tube and toothbrushes are some of the most complex items to recycle due to the number of different materials that make up each item. From what I can work out (and please correct me if you know more about this), my local council (Brisbane City Council) does not recycle toothpaste tubes or toothbrushes. Remember that technically all plastics ‘can’ be recycled – but they have to be processed by the correct facilities designed to handle them. For example, soft plastics are not recycled by my council however I can send them to REDcycle to make into plastic school furniture. The only current national scheme I could find to recycle toothbrushes and toothpaste tubes is TerraCycle. Even then, you have to somehow get all toothpaste out of the tube before sending it in…

Because I believe recycling is a small part of the answer, but definitely not the solution to our waste problems, I needed a waste free solution that worked. Oral hygiene is important! Especially when you’re pregnant ladies!

I did heaps of research on recipes and what to include/what to avoid and we ended up up going with a recipe my cousin, Sarah suggested as they had trialled a few before settling on this recipe.

Now I initially set out to make a toothPASTE…but ended up going with a toothPOWDER. Tom wasn’t convinced to start with – the change to a toothPOWDER made him even less keen. To be fair, I was sceptical too! To Tom’s credit, he always says he’ll give something I suggest a go – for which I am very grateful! Plus there was a small bit of commercial toothpaste left if it all went horribly wrong…

One of my initial concerns to switching to wastefree/DIY toothpaste was health based – are we actually endangering our oral health by not using commercial toothpaste?

When I started researching what’s actually in toothpaste and the function of each ingredient I was actually a little surprised – perhaps it wasn’t the ‘miracle’ product that protects your teeth like I thought it did.

These are the ingredients below from a very well known brand of toothpaste that we usually bought. You can find these ingredients listed on SmartLabel.  I was a little underwhelmed…

Active Ingredients

  • Sodium Fluoride – used to help prevent cavities

Non-Active Ingredients

  • Sorbitol – sugar alcohol that helps hydrate the mouth
  • Water – helps dissolve the other ingredients
  • Hydrated Silica – used as an abrasive to help clean teeth
  • PEG-12 – helps retain moisture/dissolve other ingredients
  • Sodium Lauryl Sulfate – foaming agent
  • Flavour – improves taste
  • Cellulose Gum – used as a thickener
  • Tetrasodium Pyrophosphate – used for tartar control
  • Cocamidopropyl Betaine – foaming agent
  • Sodium Saccharin – sweetener
  • Methylcellulose – thickener
  • FD&C Blue No.1 – provides colour
  • FD&C Yellow No. 5 – provides colour

As you can see above, the only ‘active’ ingredient (intended to provide therapeutic effect) is fluoride.  The fluoride issue I’m really on the fence about – I can see benefits for and against and I need to do a lot more research before I make up my mind. Because we live in Brisbane where fluoride is added to our drinking water, I wasn’t too stressed about leaving it out of my toothpaste and continuing to sit on the fence about how I feel about it! I’ll chat to my dentist about it next time I’m there for my 6 monthly check-up!

Anyway, long story short – Tom and I decided that personally we were comfortable enough in ourselves and our health to ditch the commercial product and make our own toothpaste. Remember that good oral health always starts with a nutritious diet and adequate hydration with plain old water!

On to the recipe!

We used this recipe for our toothpowder. Check out Going Zero Waste for heaps of great zerowaste recipes and inspiration – love this blog!

DIY Tooth Powder

fullsizeoutput_c5d
Not quite waste free..damn plastic packaging in health food stores! The xylitol will last us many years, however next time I’ll buy it package free from Source Bulk Foods.
  • ¼ cup bentonite clay – we purchased ours here in my last Biome (one of my favourite stores!!) order because it was packaged waste free and I can use the jar for other DIYs. However, I’ve since found out you can buy it far cheaper and package free at Source Bulk Foods for $8.50 a kilo!! To be fair – the jar would be worth a couple of dollars and I’ll definitely use it.  Bentonite clay comes from the ash of volcanos, draws out toxins and is full of vitamins and minerals, like calcium.
  • ¼ cup organic bicarb soda ($7.5kg at Source Bulk Foods).  Bicarb soda works as a very mild abrasive to remove plaque and neutralise pH.
  • ¼ cup xylitol ($23.50kg from Source Bulk Foods) is a natural sweetener (from birch bark or corn) and prevents bacteria from sticking to teeth, neutralises pH and balances out the salty taste of the bicarb.  I didn’t realise you could buy it at Source Bulk Foods and I could not find it anywhere that wasn’t in plastic! So this wasn’t zero waste – having said that, it will last us forever!!! And saves many toothpaste tubes in the long run and the soft plastic can be recycled easily. If you have dogs, make sure you keep this and the toothpowder well out of their reach – it’s extremely toxic to dogs!! I wrote myself a reminder on the packet just to make sure…
  • Few drops food grade peppermint essential oil – make sure the brand you use is safe for ingestion – do your own research and make sure you’re happy with their safety standards and be particularly cautious about what brand and what oils you use in pregnancy.  We chose peppermint as we were a bit nervous as to how it would taste and this is the closest to our commercial brand! This is not necessary or you could experiment with other food grade essential oils based on the benefit you’re looking for.

Mix it all up and store in a glass jar (metal can react with bentonite clay so glass is best).

I’m not quite sure how much ¼ cup weighs, but I’m guessing it’s around 40g so price break down would be as follows

  • Bentonite clay 34c
  • Bicarb 30c
  • Xylitol 94c
  • Peppermint oil 40c

= $2.32 for an 8 oz (220g) Ball jar which will last Tom and I months and months as you only use the tiniest amount!

We also purchased Bamboo toothbrushes from Biome so we can compost the handles (the bristles need to be removed first as they are made of nylon) in our garden, thus avoiding having to throw them in the rubbish or send in to TerraCycle.

So the question you all want to know…HOW DOES IT TASTE AND DOES IT WORK?!?

I won’t lie, I was nervous after the first use because it tasted super salty to both of us and the texture is unusual when you’re used to a product that foams up!  However, after about 4 uses it now tastes neutral (your tastebuds must adjust?) and we can both honestly say our teeth actually feel cleaner for longer when using the tooth powder compared to commercial toothpaste! I don’t think we’d ever go back.  We’re both as shocked as you!

How do you use it? Dip a dry brush in and pick up a little bit of powder.  Your saliva will quickly work to spread it around your mouth and brush like normal!  We share a jar because we love each other… but if one of you was sick, I would portion it out into your own jars.

fullsizeoutput_c5e
Excuse the dodgy photo – it was night time…

*common sense disclaimer* as with all recipes and ideas that will be featured on this blog, please use your common sense and research yourself to keep yourself and your family healthy and safe.  I am a firm believer in trusting your gut if something doesn’t feel like the right choice for you or your family.  This is not in anyway meant to replace the advice of medical professionals or deal specifically with any personal health concerns you may have. Chat to your team – health professionals, friends and family, do your research and make choices that are right for you.

Eat-in date night idea #1 and working towards waste free meals

Tom and I love cooking together, especially when we have some extra time to spend making something extra delicious! Most nights I lead the cooking and Tom potters around after me cleaning up as I go, however recently he has been doing heaps of cooking (I blame ‘all day sickness’ and pregnancy fatigue) and he is so good!  Tom’s set a recent goal to start learning how to make more vegetarian meals – which is a big deal for this country carnivorous boy!  Tom came up with this little recipe idea and had a great time trying to do it with as little waste as possible too.

Cooking together provides us with the perfect opportunity to actually catch up, whilst being creative with food and enjoying the spoils of our veggie patch.  Rather than flopping onto the couch after cooking dinner (to watch River Cottage Australia), we sat outside and enjoyed an uncharacteristically warm August evening with no technology allowed.  It’s a privilege to be able to enjoy these moments together before we bring a little kidlet into the world who will probably be ‘witching’ right through pre-time, dinner and dessert…

Eating-in is also a great way to start reducing your household waste instantly.  Think about all the disposable containers, serviettes and cutlery you go through buying takeaway!  Plus it’s often the cheaper option – great for a couple trying to save before I go on maternity leave! We do still love to go out now and then (we’re suckers for our local Indian takeaway shop and some great Brisbane cafés), but to be honest – going out means trying to find something nice to dress my huge bump in when I really just want to be walking around in my pilates pants and birkenstocks…#pregnantlife

We hope to add other meals to this ‘Eat-in Date Night’ series with the hope of encouraging your family to spend quality time cooking and eating together.  We’ll also try and point out ways we are learning to reduce waste whilst cooking.  I’ve never measured anything in my life and I rarely follow a recipe…so I’ll try my best to give you something you can replicate!

Hand-cut Pappardelle Pasta with Roasted Tomatoes

Ingredients

Pasta

  • 400g flour (you should probably use Tipo 00 but we just used plain white flour)
  • 4 free range eggs (from our local farmers’ market)
  • Splash or two of good quality olive oil
  • Few pinches of salt (we only use freshly cracked pink himalayan salt, apparently we are salt snobs. Our friends pay us out about it. Nothing else is as tasty! We dare you to prove us wrong!)

Sauce

  • 50-100g butter (depends on how fatty you feel…)
  • 2 hand-fulls of tomatoes (we grew these ones by accident in our compost heap!)
  • 2 hand-fulls of mushrooms sliced (we prefer Swiss Browns from our local farmers’ market)
  • 1 hand-full of whatever herbs you have growing chopped (we had heaps of oregano and rosemary so used that, but basil or thyme would also be lovely)
  • 2-10 cloves of garlic chopped (I’m the kinda girl who sees 2 cloves of garlic in the recipe and automatically translates that to 10…I believe the pregnancy reflux is worth it, but you might not!)
  • Olive oil
  • Salt & pepper

Method

  1. Set oven to 200 degrees celsius fan-forced.
  2. To make the pasta dough, combine all ingredients in a stand mixer and mix with flat beater attachment on low until combined (or stir ingredients together with a wooden spoon if you don’t have a stand mixer). Side note – our friends all went in together to buy our Kitchen Aid as an engagement gift about 7 years ago – it’s one of my most favourite gifts and I’m so thankful to them all for their generosity!)
  3. Knead with a dough hook on low for about 5 minutes or until the dough indents when you touch it.  Kneading by hand is also fun and burns a few extra calories (just flour your bench first).
  4. Cover dough and rest for 30 mins while you prep your sauce.
  5. Place tomatoes on a tray, cover in olive oil, salt and pepper.  Roast in oven until squishy (approx. 15 minutes but keep an eye on them).
  6. After your pasta dough has rested, divide into 4 pieces.
  7. Take one piece and flatten it out with your hand or rolling pin.
  8. Start on the lowest setting of your pasta maker (we are spoilt with our KitchenAid because you can pasta roll hands free!). Feed it through once, then fold over and feed it through again.IMG_0368
  9. Work your way up the settings until you reach your desired thickness (level 4 for pappardelle on our machine).  I always feed the pasta through at least twice on each setting and sometimes it’s easier to work with short pieces than getting into a tangled pasta mess.
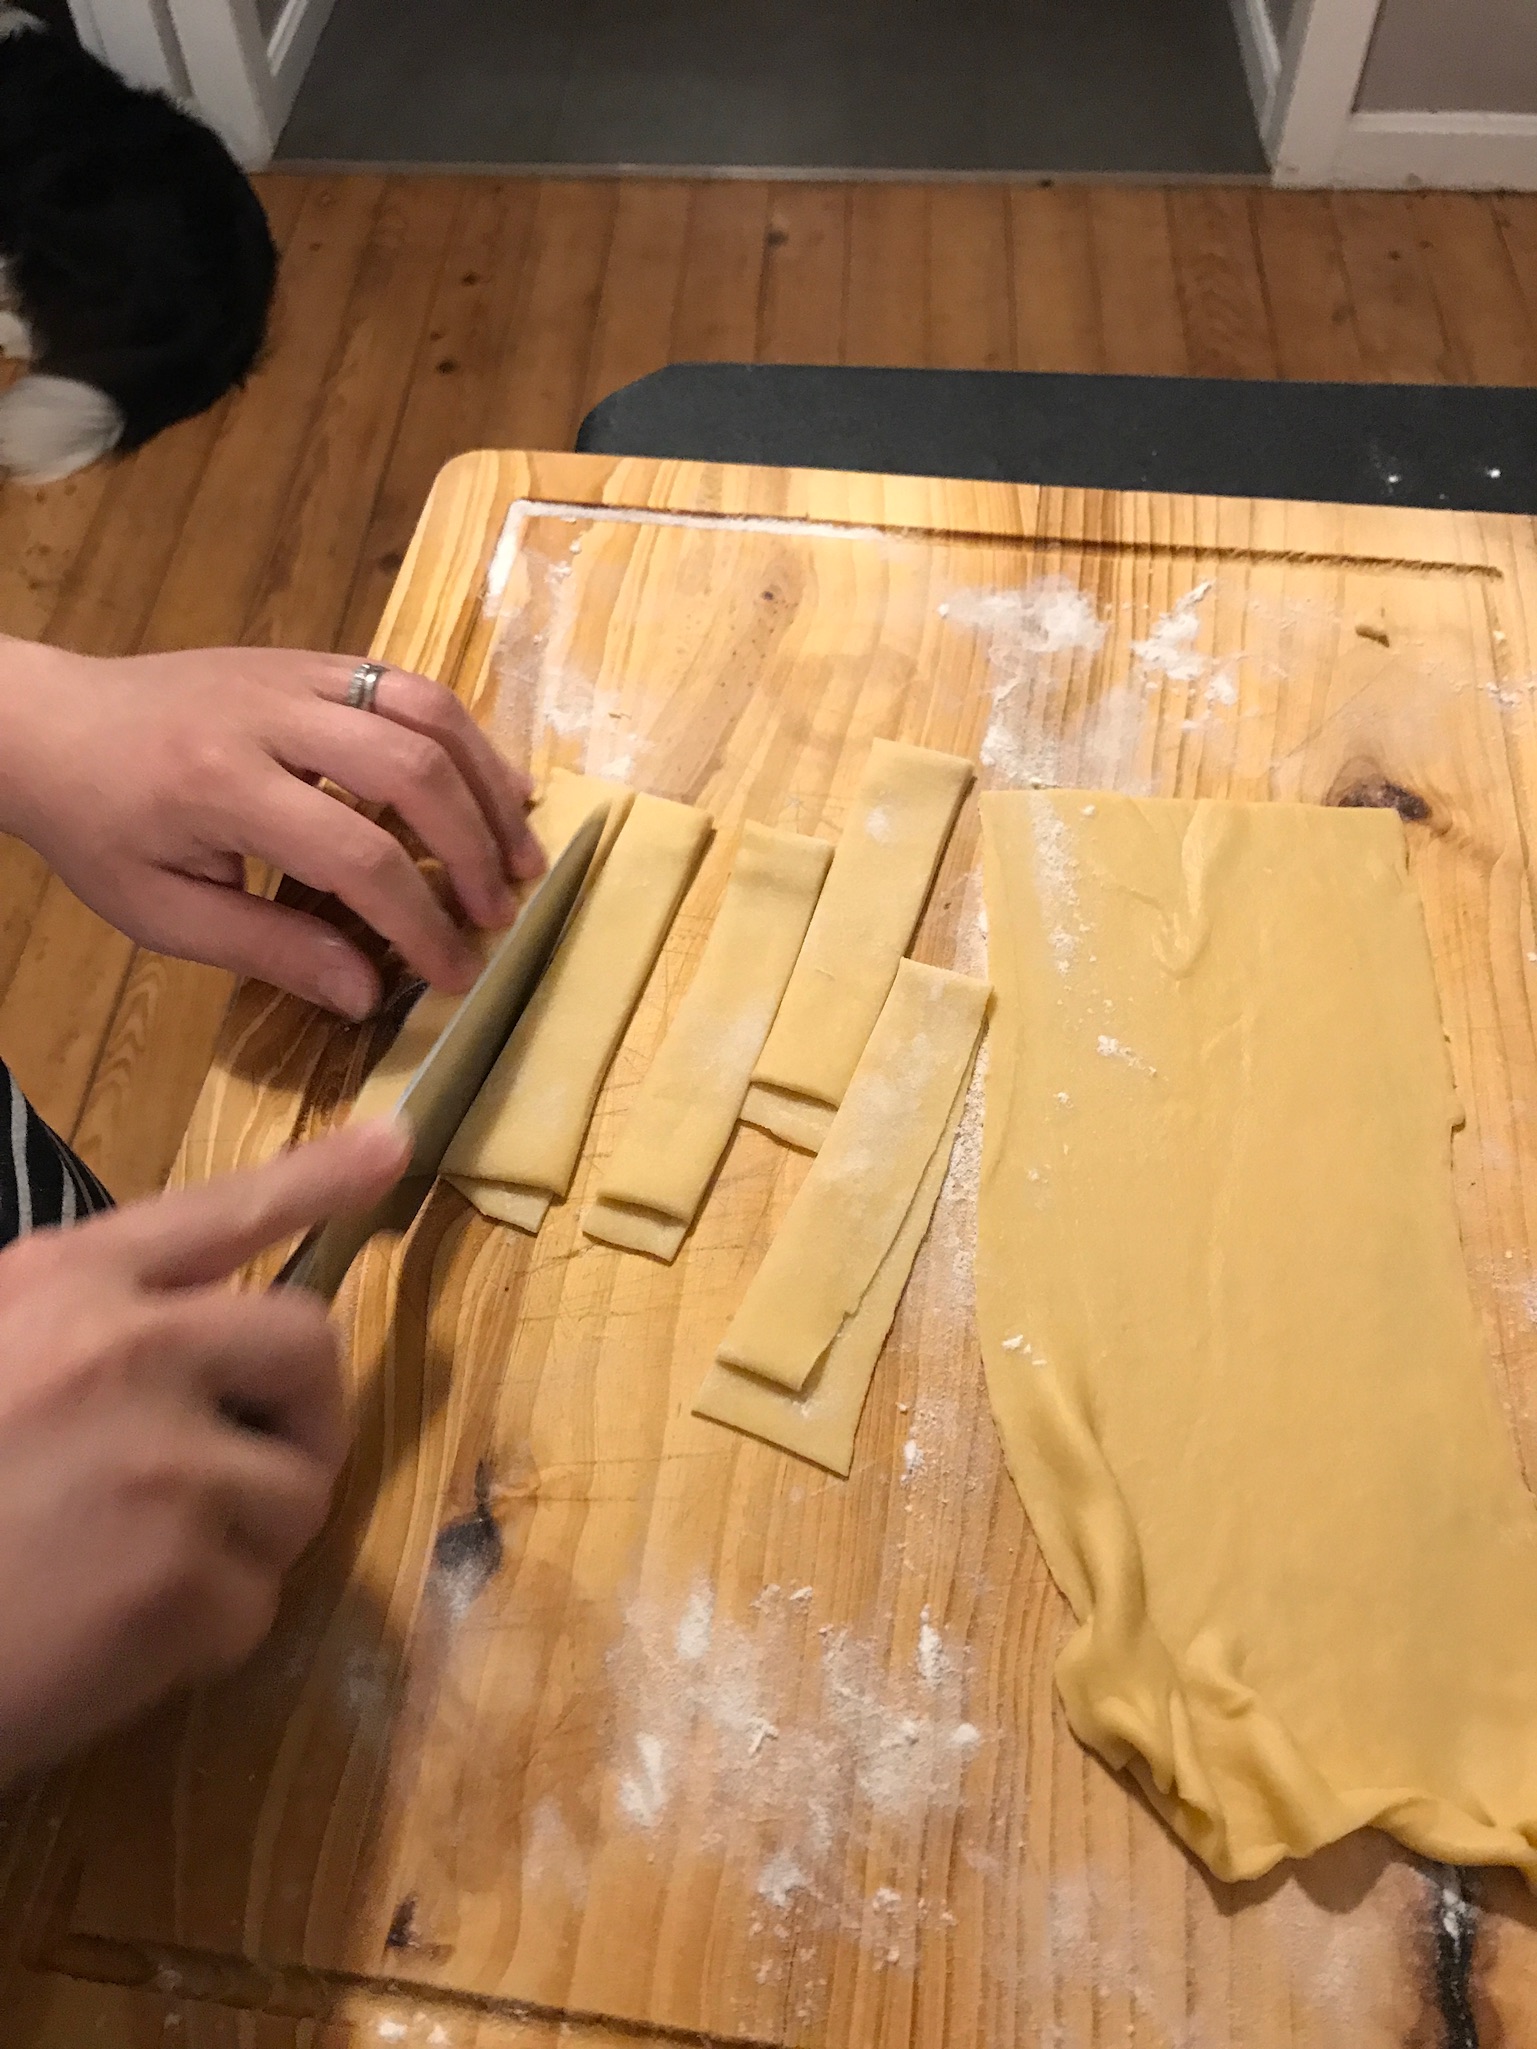
  10. Once rolled to the correct thickness, bring over to your bench and sprinkle with flour.  Fold pasta over a few times and cut your pasta strips to your desired width (our was probably a bit wide!)
    IMG_0353
    We were a bit rough with our cutting…we were hungry!
  11. A pasta drier is a super useful tool to manage all your pasta strands whilst you’re still rolling, but you can just lie them on a floured chopping board or clean tea towel.
  12. Boil a pot of heavily salted water.
  13. Throw butter, mushrooms, herbs and garlic into a fry pan and sauce on medium high until mushrooms are browned and it smells delicious!
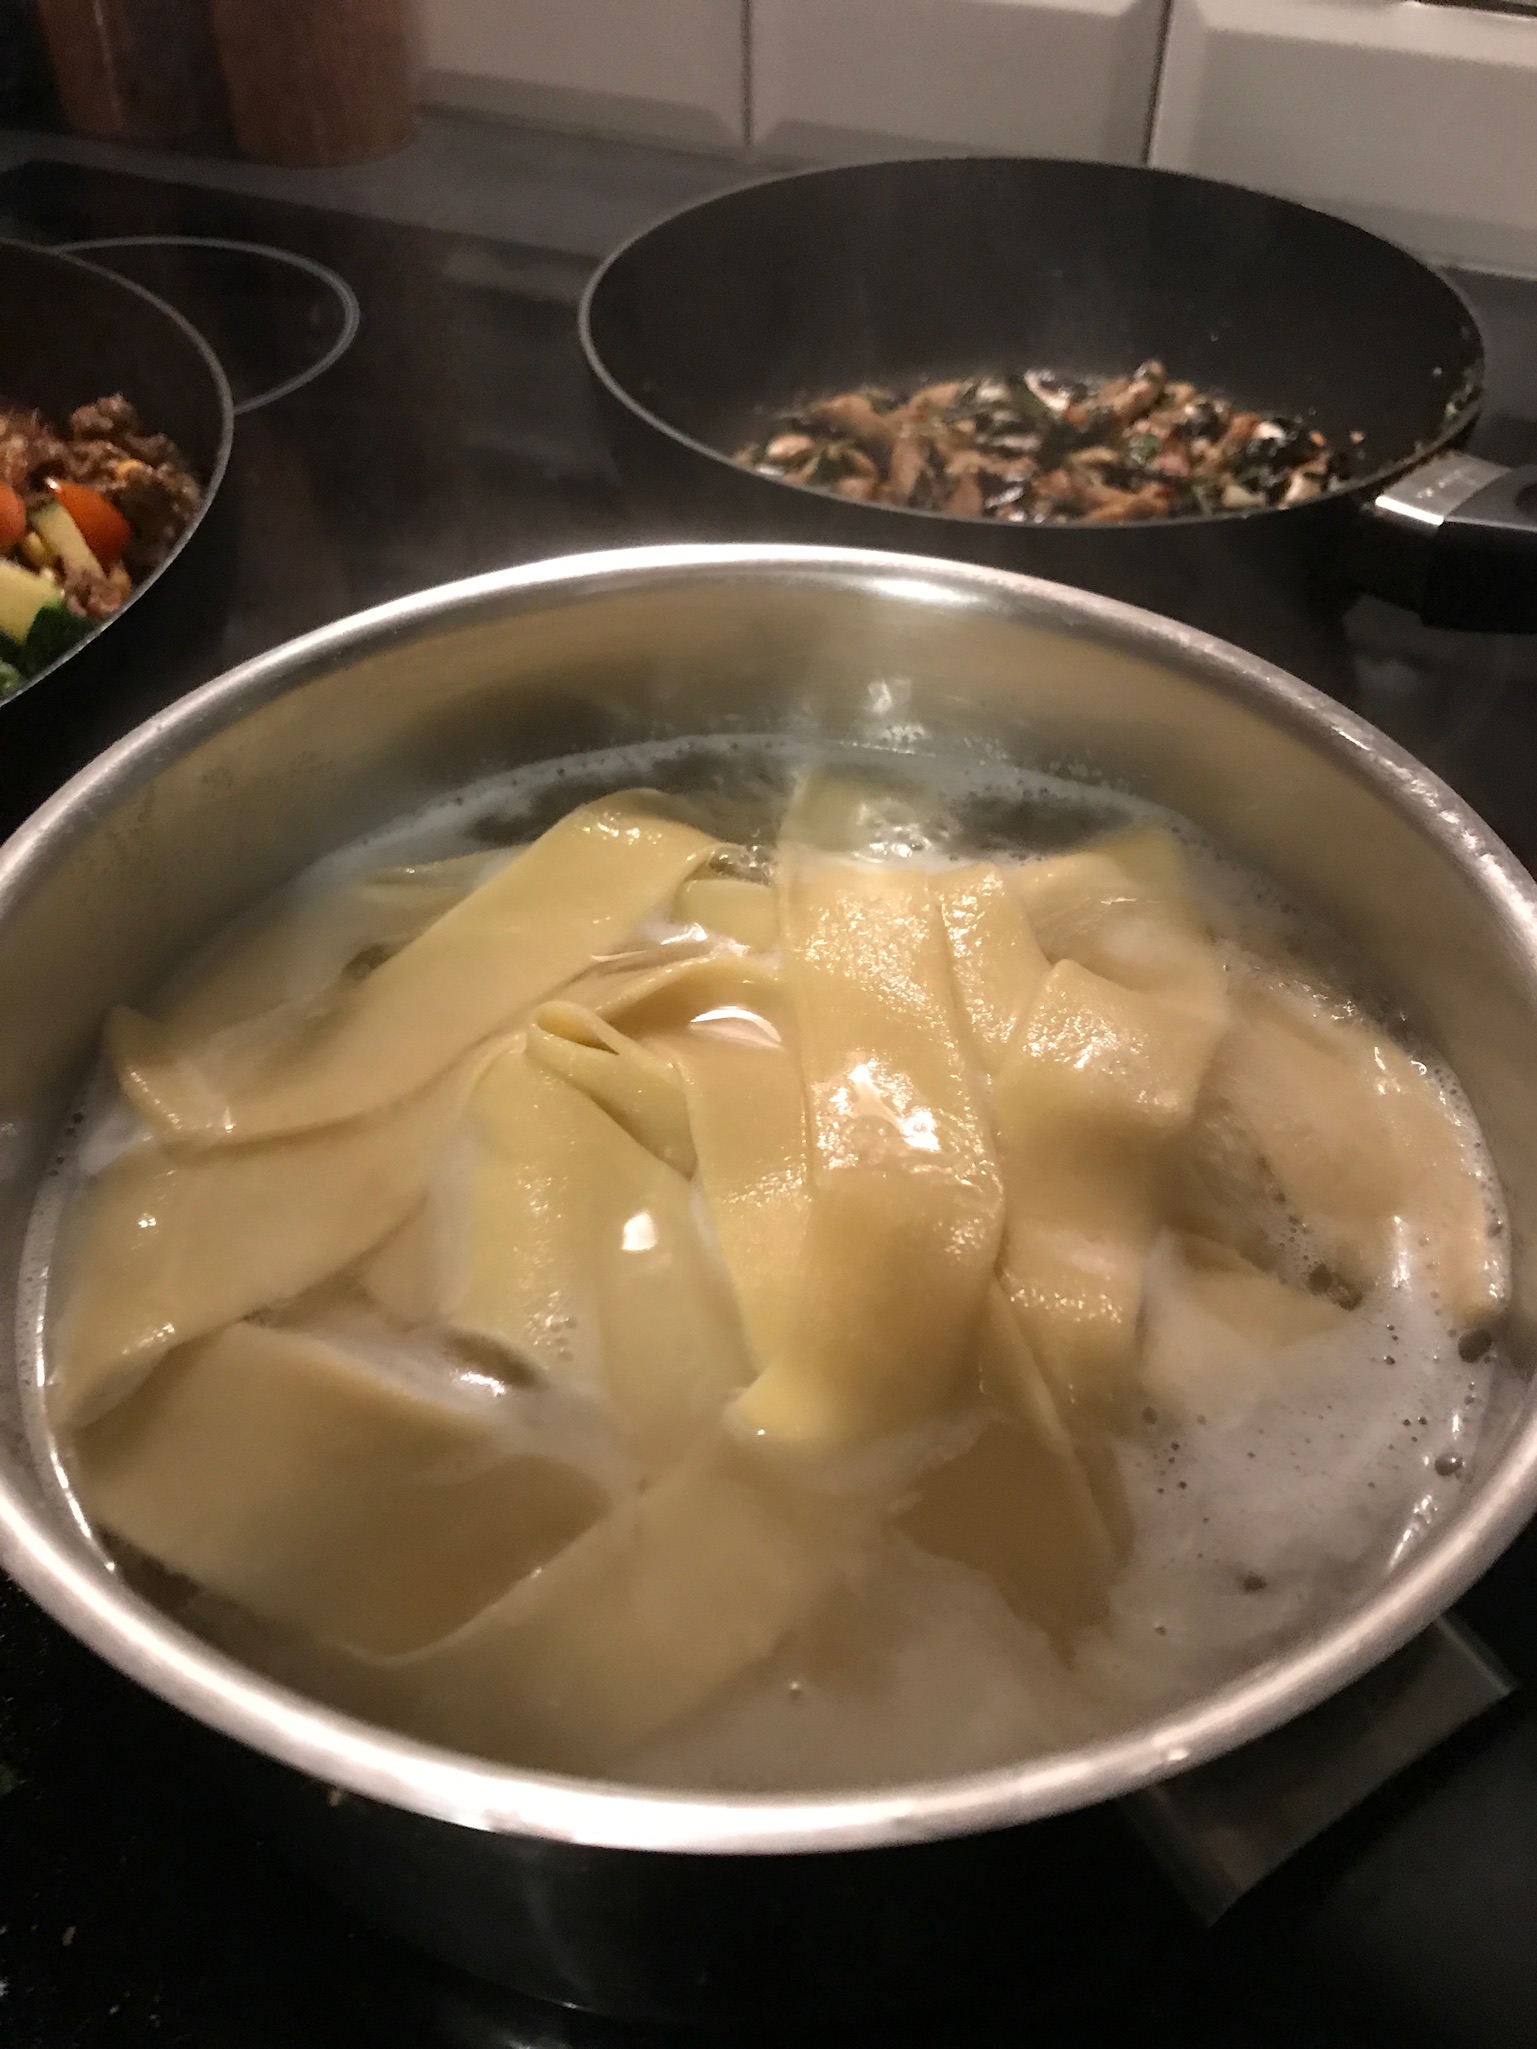
  14. Pop your pappardelle pasta in the boiling water (don’t over crowd) and cook for about 5 minutes but taste as you go until al dente.IMG_0412 2
  15. Mix you tomatoes in with your buttery mushroom sauce.  Drop cooked pappardelle in the fry pan and shake it all together!
  16. Finish with grated parmesan cheese and enjoy with a delicious glass of wine if you are of the non-pregnant variety…Note – there was enough pasta to feed us for 2 nights – we just rolled the left over uncooked pasta into little nests, sealed them in a container and put them in the fridge for the next night – pasta cooks in 5 minutes!  I believe you can freeze fresh pasta (it’s never lasted that long in our house) but would be a great way to save time and have a fancy meal!IMG_0377

A nearly #wastefree meal

  • Flour came in paper that we recycled. Will plan to purchase flour from bulk whole foods store when we next run out and store in glass jar.
  • Mushrooms packaged in paper bag which we recycled – I’m not sure why when we had our calico mini bags at the markets…habit I guess!
  • Eggs in a paper carton I saved thinking I might be able to sew seeds in it for the veggie patch?
  • Oil in a large glass jar we’ll continue to refill and recycle at the end of it’s life.
  • Butter paper I washed, dried and saved for making into muffin tray liners
  • Baking paper to cook tomatoes on – washed, dried and reused (you’re not meant to recycle this as it’s coated in silicone).  I’ve recently replaced our usual brand with ‘If You Care’ parchment paper which is unbleached, chlorine free and totally compostable.
  • Parmesan came in a soft plastic bag we had in freezer.  When this runs out we will take a beeswax wrap to the deli section and purchase a chunk of parmesan not covered in plastic. This bag will go to Redcycle when we finish it.  The parmesan is a bit of a #wastefail but I’m choosing to look at these things as something we are working towards changing and trying not to be too hard on myself! You have to start somewhere!

5 things you can do to kick start your own war on waste

Whilst we’ve have always been quite conscious about the amount of waste our household produces, it hasn’t been until recently that we’ve started to make a dedicated effort to reduce our waste at home.  We’ve been greatly inspired by our gorgeous cousin Sarah, who has been on this journey with her husband for quite some time and are getting very close to living in a zero waste household.  The impending birth of our first child has pushed us in the right direction as we desire to create a home and life for him that is nutritious, chemical free, positive, values people and protects the Earth for him to enjoy in the years to come.

We are just beginning this journey and know we have a long way to go!  But we can’t all start at the end (although my personality greatly wishes we could!) and I have to keep reminding myself that little things add up and sustainable change takes time.

Here are 5 easy things that we’ve been able to quickly change over the last six months to drastically reduce our household waste.

  1. Buy reusable shopping bags.  This one is cheap and easy! The hardest part for me is remembering to pack the bags back in the car before I go to the shops/market! We prefer our heavy duty calico totes that our local farmers’ market sells as they are a lot better quality than those you can buy at the supermarket – but the supermarket ones are convenient at the checkout! Build up your supply over the next few months and soon you won’t be needing plastic bags again. We also have smaller calico draw string bags I picked up at a health food store one day that we use to package up smaller fruit and veg like cherry tomatoes, garlic, ginger, chilli etc.
  2. Ditch the supermarket! We started this about a year ago – mostly out of my complete hatred for shopping and shopping centres.  I’m extremely short and can never reach anything off the shelves and can’t reach into the bottom of the trolley! Plus everyone is always in a rush and I was spending so much money on food covered in unnecessary packaging!  We exclusively shop at our local farmers’ market now for all of our fruit, veg, seafood, spices and dairy. We have a local bulk butcher for our meat down the road.  About once a month I’ll send Tom to a supermarket to stock up on canned goods or I’ll do an online order (however they package everything in plastic bags so I’m not going to do this anymore). Ditching the supermarket means you are forced to buy food that doesn’t come in plastic packaging! It makes the war on waste so much easier! Plus it makes for a lovely Saturday morning! We are friends with all of the producers who supply our food, we love walking around in the sun and we have found veggies and fruit are definitely much cheaper and better quality that what you can find at the supermarket.  If we’re in a hurry we can smash out our shop in 20 minutes or we can do it leisurely and enjoy breakfast together with the dogs (as pictured above!).IMG_8188
  3. Know what you can recycle. Whilst recycling is not the answer to our extreme waste problems, it certainly is better than throwing things straight into landfill.  I didn’t realise that I was so uneducated about what can be recycled! I’ve found this guide really useful if you live in Brisbane City Council and they also have an iPhone app you can refer to if you’re not sure.  Basically ask yourself what the item is made of? If the answer is paper, cardboard, hard plastic, metal (aluminium and steel) or glass it’s more than likely recyclable.  Soft plastics (anything you can scrunch in your hand) can be collected and disposed of in a RedCycle bin. Ours is at our local supermarket so we can drop soft plastics there when we do our monthly canned good stock up.  We are working towards reducing all plastics in our home though so hopefully we won’t have to do this for too long (but that’s for another post!).
  4. Start a compost bin. We had an awesome worm farm/compost heap going…until a contractor up-ended it whilst building our perimter fence.  I was probably more upset about that than I should have been…but it had been months of collecting fruit and vege scraps! Our current one is a bit lacklustre so we’re trying to amp that one up before we need to turn our veggie patches for the Spring crop.  I was looking at‘urban compost systems’ today – has anyone used them before?  My Mum and Dad have one and get great ‘compost juice’ out of it! Any recommendations?
  5. Grow your own food. This one can be a little tricky if you live in an apartment but we managed to grow herbs and a few little shrubs on our tiny verandah before buying our house.  We even grew a blueberry tree! Which fruited just before it (and our cars) got completely trashed by a Brisbane hail storm…  I’ll post more about our veggie patches another day, but currently we have 3 raised beds we purchased from Bunnings. Raised beds allow us to bring in far better quality soil than we could ever have got out of our clay block of land.  Last season we were almost able to live off the veggies we grew and we required minimal top-ups from the markets, but this season has been a shocker.  We’re eagerly looking forward to our Spring crop which will be planted shortly.

IMG_1525.JPG

Although these are only simple ideas, we’ve found these 5 things to be key in quickly reducing our household waste.  I also love that whilst we are reducing waste, we are so much healthier because we are eating, fresh seasonal food without using multiple artificial food additives and flavourings!

What would you add to the list?

Katie

welcome

I’m not really sure if this blog will be of any interest to anyone…but at least I know my husband and my Grandma will read it!

The idea to start this blog came out of lots of little life changes recently that have been sparking lots of discussion amongst my fiends and family.  Have a read here for a bit of the background story.

I would love this blog to turn into a little community of positive, like-minded people spurring each other on in small, positive changes that benefit humankind and our planet.  I hope you feel that you can discuss how your family do things and what works best for you.  I’m always keen to hear about new and old ways of doing things!  We are just starting out on this journey, so we have much to learn (and probably not much to offer yet!).

I imagine this blog will mostly feature things about our journey to reducing waste, how we are reducing chemicals in our home, thoughts on pregnancy and mothering, easy meal ideas, great organisations/businesses to get behind, budget reno ideas/fails and our journey into parenthood.

What would you like to read about?