Our Vegie Patch (Spring 2017)

The warmer mornings are making getting out of bed a little easier and the days are starting to lengthen, allowing more time for fetch with the doggos.  My belly is stretching beyond what I believe is possible (even though it’s got a long way to go) and the little human inside of me is getting stronger and more wriggly every day.  The first of my stretch marks has well and truly made itself at home and I am relieved – because it means our little guy is growing despite having a few things going against him.

All of these observations mean that Spring is here and that it’s well and truly time to start thinking about our Spring/Summer crop.  We moved our vegie patches last season to the front of the yard (to keep them away from our vegie loving Border Collies) and they really struggled with less sunlight.  I’m crossing my fingers and toes that the longer summer days will be enough to keep our vegies going this season.  We only have a small set up, but we keep adding to it as we can afford to.  It’s growing with our family!

This planting season has been influenced greatly by our journey to reducing waste in our home.  We are now more than ever, reliant on the veg we can grow to provide us with waste-free, organic eating options.  We are also heavily invested in our compost pile and Tom has been diligently adding to it and turning it every couple of days.  We’ve actually just upgraded our compost system to keep up with our vegie patches, but I’ll write another blog post about this later.

Most planting seasons I’m too disorganised to grow from seed, so we usually buy seedlings from a lovely old couple at our local farmers’ markets.  Whilst we love buying from them (and I’m sure we still will at times!), buying seedlings comes with a bunch of plastic containers, that are reusable but to be honest – I’ve never reused them (mostly because we destroy them trying to get the seedlings out!

This season we’ve decided to give planting from seed a go! Our main reasons for doing this are to give ourselves a new challenge, support heirloom varieties, increase our plant diversity, support a small Australian business and to reduce our waste in the process.

We’ve decided to purchase our seeds from Backyard Seeds.  Backyard Seeds began as a small seed farm in the Yarra Valley.  Their seeds are sent in 100% recycled paper seed envelopes and they provide detailed growing notes and tips about each plant and harvest methods. We also really like that you can buy them in seasonal packs with realistic numbers of seeds (i.e. the number of seeds you would actually plant rather than buying a packet of 300 seeds from Bunnings that you’re likely to forget about, throw out or not store properly…) This reduces packaging waste and also reduces wasted product.  It also allows you to try out a large variety of vegies cheaply!  The individual seeds do some in small soft plastic bags which we’ll save and reuse for future plantings.  They are probably necessary to keep the seeds sealed and fresh during postage, but I wonder if small paper envelopes could be used? They come with easy to understand instructions and each seed packet is labelled with key information.  We think this Aussie company is on to something and more than happy to recommend them.

This Spring/Summer we have purchased the Spring/Summer Vegetable and Herb Selection for $18.00 which includes:

  1. Basil (Sweet Genovese) x 50
  2. Beans (Climbing Blue Lake) x 20
  3. Beetroot (Detroit Dark Red) x 30
  4. Carrot (Nantes) x 150
  5. Corn Sweet (Balinese) x 15 (Not TAS or WA)
  6. Cucumber (Lebanese) x 8
  7. Leek (Giant Carentan) x 30
  8. Lettuce (Paris Island Cos) x 100
  9. Pak Choi (Green) x 30
  10. Parsnip (Hollow Crown) x 100
  11. Pumpkin (Waltham Butternut) x 8
  12. Spring Onion (White Lisbon) x 100
  13. Tomato (Roma) x 20
  14. Tomato (Yellow Pear) x 20
  15. Zucchini (Black Beauty) x 8

YUM!

We’re also obsessed with tomatoes…so we picked up the Rare Heirloom Tomato pack for $15 which will last us a few seasons as tomatoes grow at any time of the year here.

  1. Snow White Tomato x 20
  2. Black Cherry Tomato x 20
  3. Green Zebra Tomato x 20
  4. Red Pear Tomato x 20
  5. Orange Cherry Tomato x 20
  6. Yellow Pear Tomato x 20

I’ve got a nifty little tool to show you soon which is eliminating our need for plastic tubes – more on this later!

Katie

Eat-in date night idea #1 and working towards waste free meals

Tom and I love cooking together, especially when we have some extra time to spend making something extra delicious! Most nights I lead the cooking and Tom potters around after me cleaning up as I go, however recently he has been doing heaps of cooking (I blame ‘all day sickness’ and pregnancy fatigue) and he is so good!  Tom’s set a recent goal to start learning how to make more vegetarian meals – which is a big deal for this country carnivorous boy!  Tom came up with this little recipe idea and had a great time trying to do it with as little waste as possible too.

Cooking together provides us with the perfect opportunity to actually catch up, whilst being creative with food and enjoying the spoils of our veggie patch.  Rather than flopping onto the couch after cooking dinner (to watch River Cottage Australia), we sat outside and enjoyed an uncharacteristically warm August evening with no technology allowed.  It’s a privilege to be able to enjoy these moments together before we bring a little kidlet into the world who will probably be ‘witching’ right through pre-time, dinner and dessert…

Eating-in is also a great way to start reducing your household waste instantly.  Think about all the disposable containers, serviettes and cutlery you go through buying takeaway!  Plus it’s often the cheaper option – great for a couple trying to save before I go on maternity leave! We do still love to go out now and then (we’re suckers for our local Indian takeaway shop and some great Brisbane cafés), but to be honest – going out means trying to find something nice to dress my huge bump in when I really just want to be walking around in my pilates pants and birkenstocks…#pregnantlife

We hope to add other meals to this ‘Eat-in Date Night’ series with the hope of encouraging your family to spend quality time cooking and eating together.  We’ll also try and point out ways we are learning to reduce waste whilst cooking.  I’ve never measured anything in my life and I rarely follow a recipe…so I’ll try my best to give you something you can replicate!

Hand-cut Pappardelle Pasta with Roasted Tomatoes

Ingredients

Pasta

  • 400g flour (you should probably use Tipo 00 but we just used plain white flour)
  • 4 free range eggs (from our local farmers’ market)
  • Splash or two of good quality olive oil
  • Few pinches of salt (we only use freshly cracked pink himalayan salt, apparently we are salt snobs. Our friends pay us out about it. Nothing else is as tasty! We dare you to prove us wrong!)

Sauce

  • 50-100g butter (depends on how fatty you feel…)
  • 2 hand-fulls of tomatoes (we grew these ones by accident in our compost heap!)
  • 2 hand-fulls of mushrooms sliced (we prefer Swiss Browns from our local farmers’ market)
  • 1 hand-full of whatever herbs you have growing chopped (we had heaps of oregano and rosemary so used that, but basil or thyme would also be lovely)
  • 2-10 cloves of garlic chopped (I’m the kinda girl who sees 2 cloves of garlic in the recipe and automatically translates that to 10…I believe the pregnancy reflux is worth it, but you might not!)
  • Olive oil
  • Salt & pepper

Method

  1. Set oven to 200 degrees celsius fan-forced.
  2. To make the pasta dough, combine all ingredients in a stand mixer and mix with flat beater attachment on low until combined (or stir ingredients together with a wooden spoon if you don’t have a stand mixer). Side note – our friends all went in together to buy our Kitchen Aid as an engagement gift about 7 years ago – it’s one of my most favourite gifts and I’m so thankful to them all for their generosity!)
  3. Knead with a dough hook on low for about 5 minutes or until the dough indents when you touch it.  Kneading by hand is also fun and burns a few extra calories (just flour your bench first).
  4. Cover dough and rest for 30 mins while you prep your sauce.
  5. Place tomatoes on a tray, cover in olive oil, salt and pepper.  Roast in oven until squishy (approx. 15 minutes but keep an eye on them).
  6. After your pasta dough has rested, divide into 4 pieces.
  7. Take one piece and flatten it out with your hand or rolling pin.
  8. Start on the lowest setting of your pasta maker (we are spoilt with our KitchenAid because you can pasta roll hands free!). Feed it through once, then fold over and feed it through again.IMG_0368
  9. Work your way up the settings until you reach your desired thickness (level 4 for pappardelle on our machine).  I always feed the pasta through at least twice on each setting and sometimes it’s easier to work with short pieces than getting into a tangled pasta mess.
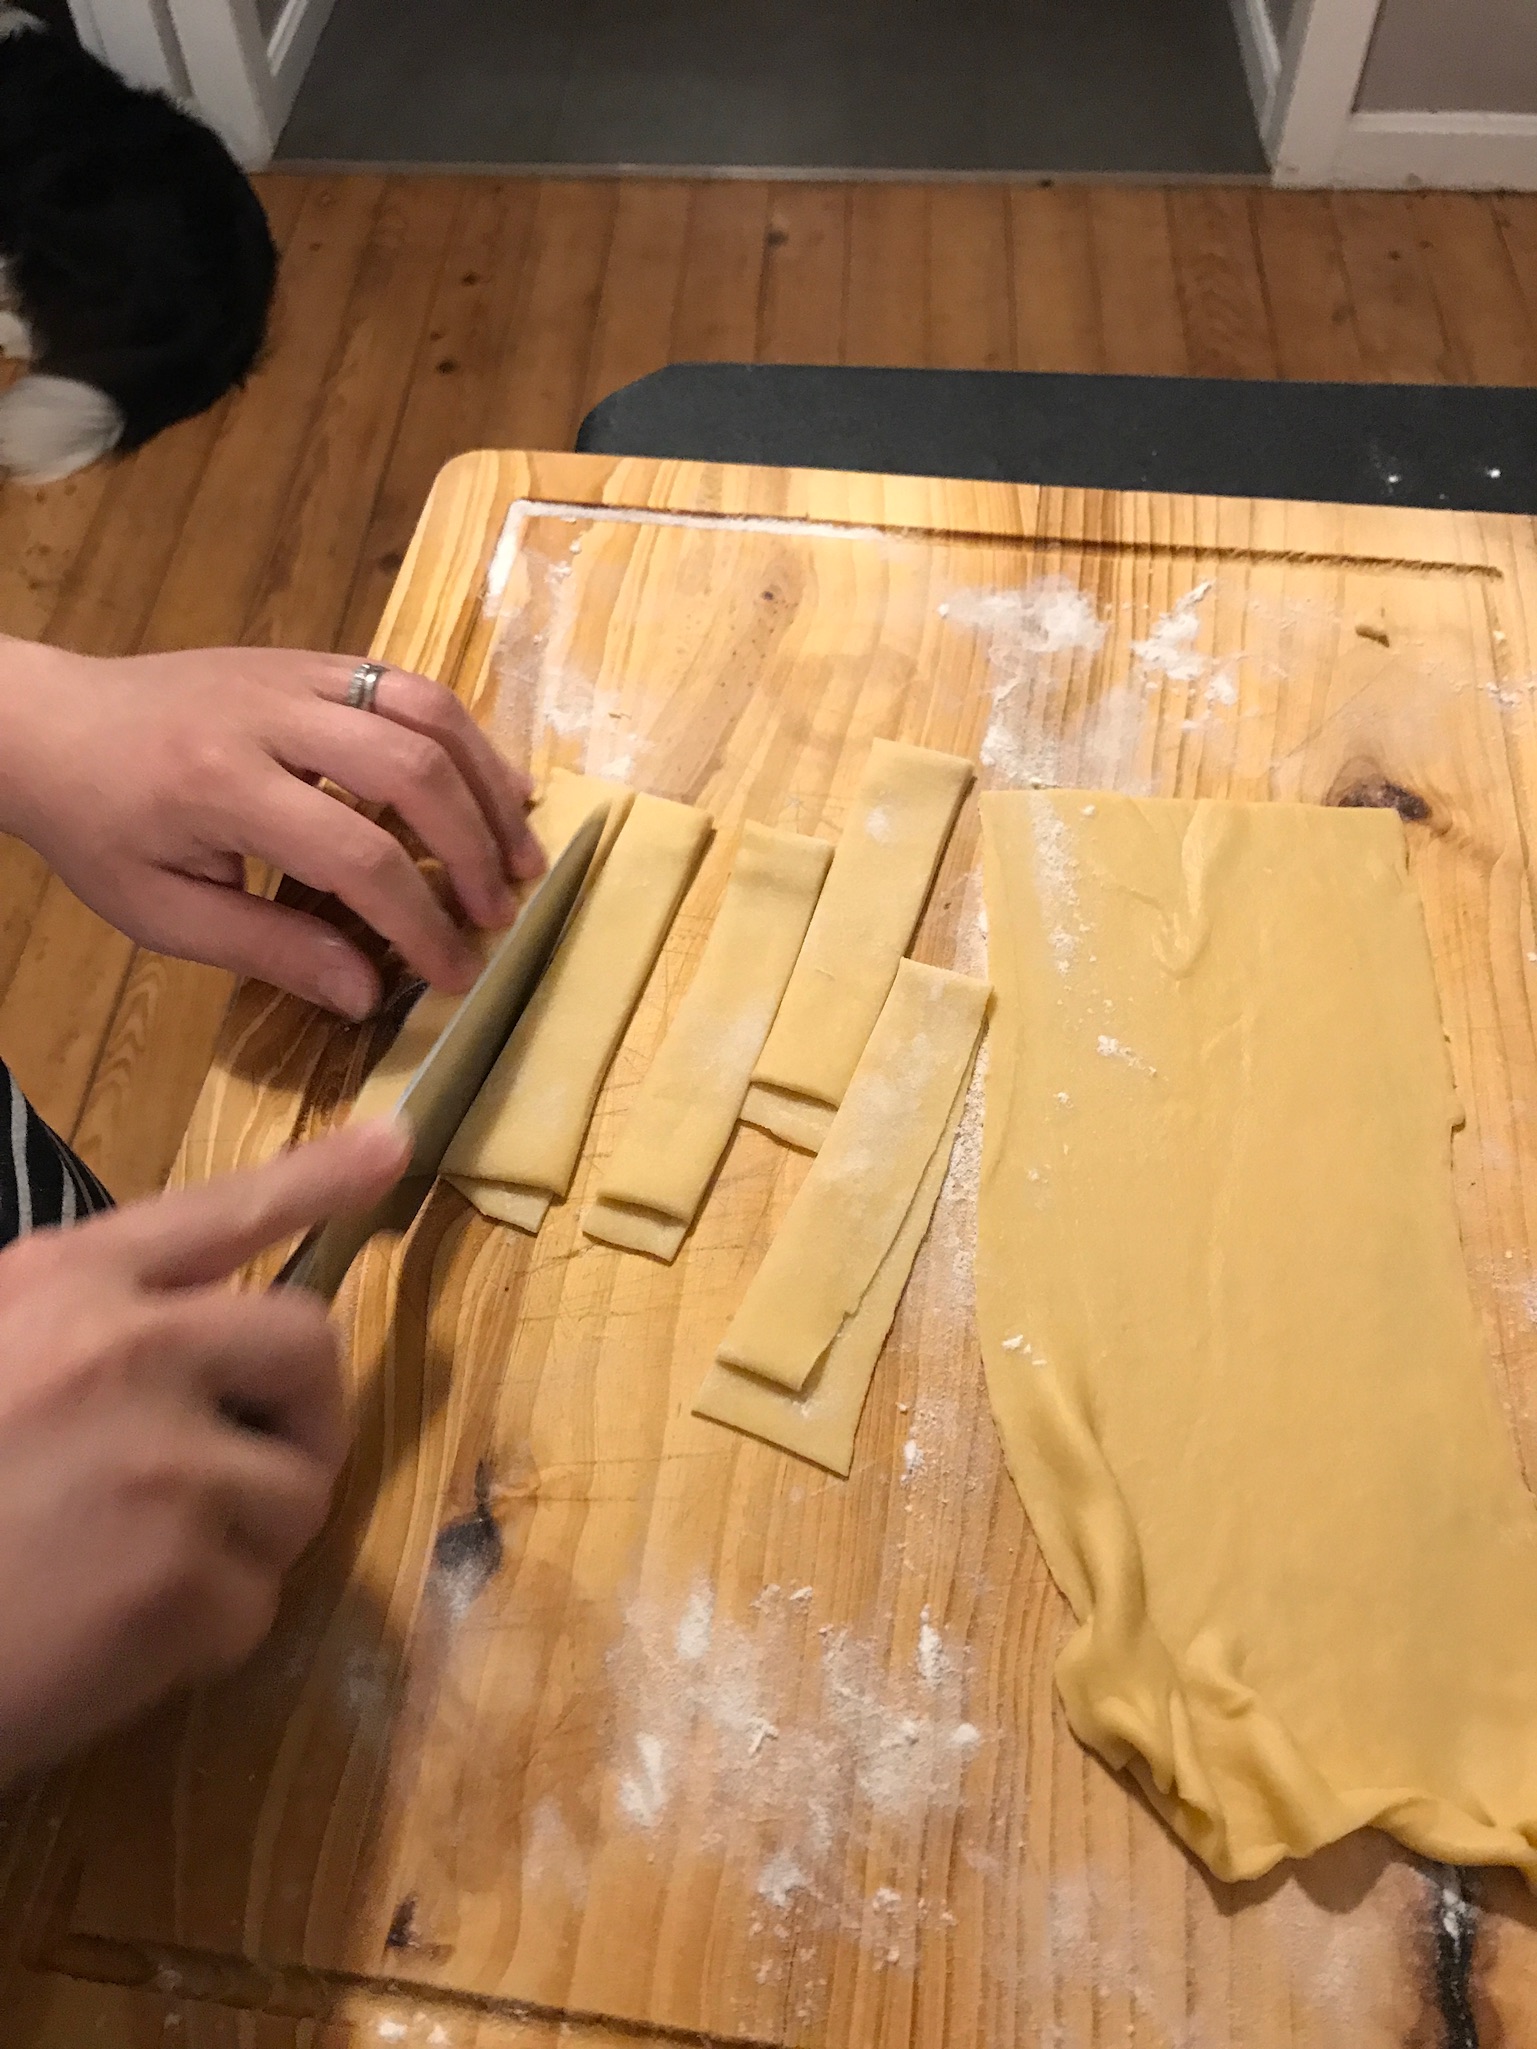
  10. Once rolled to the correct thickness, bring over to your bench and sprinkle with flour.  Fold pasta over a few times and cut your pasta strips to your desired width (our was probably a bit wide!)
    IMG_0353
    We were a bit rough with our cutting…we were hungry!
  11. A pasta drier is a super useful tool to manage all your pasta strands whilst you’re still rolling, but you can just lie them on a floured chopping board or clean tea towel.
  12. Boil a pot of heavily salted water.
  13. Throw butter, mushrooms, herbs and garlic into a fry pan and sauce on medium high until mushrooms are browned and it smells delicious!
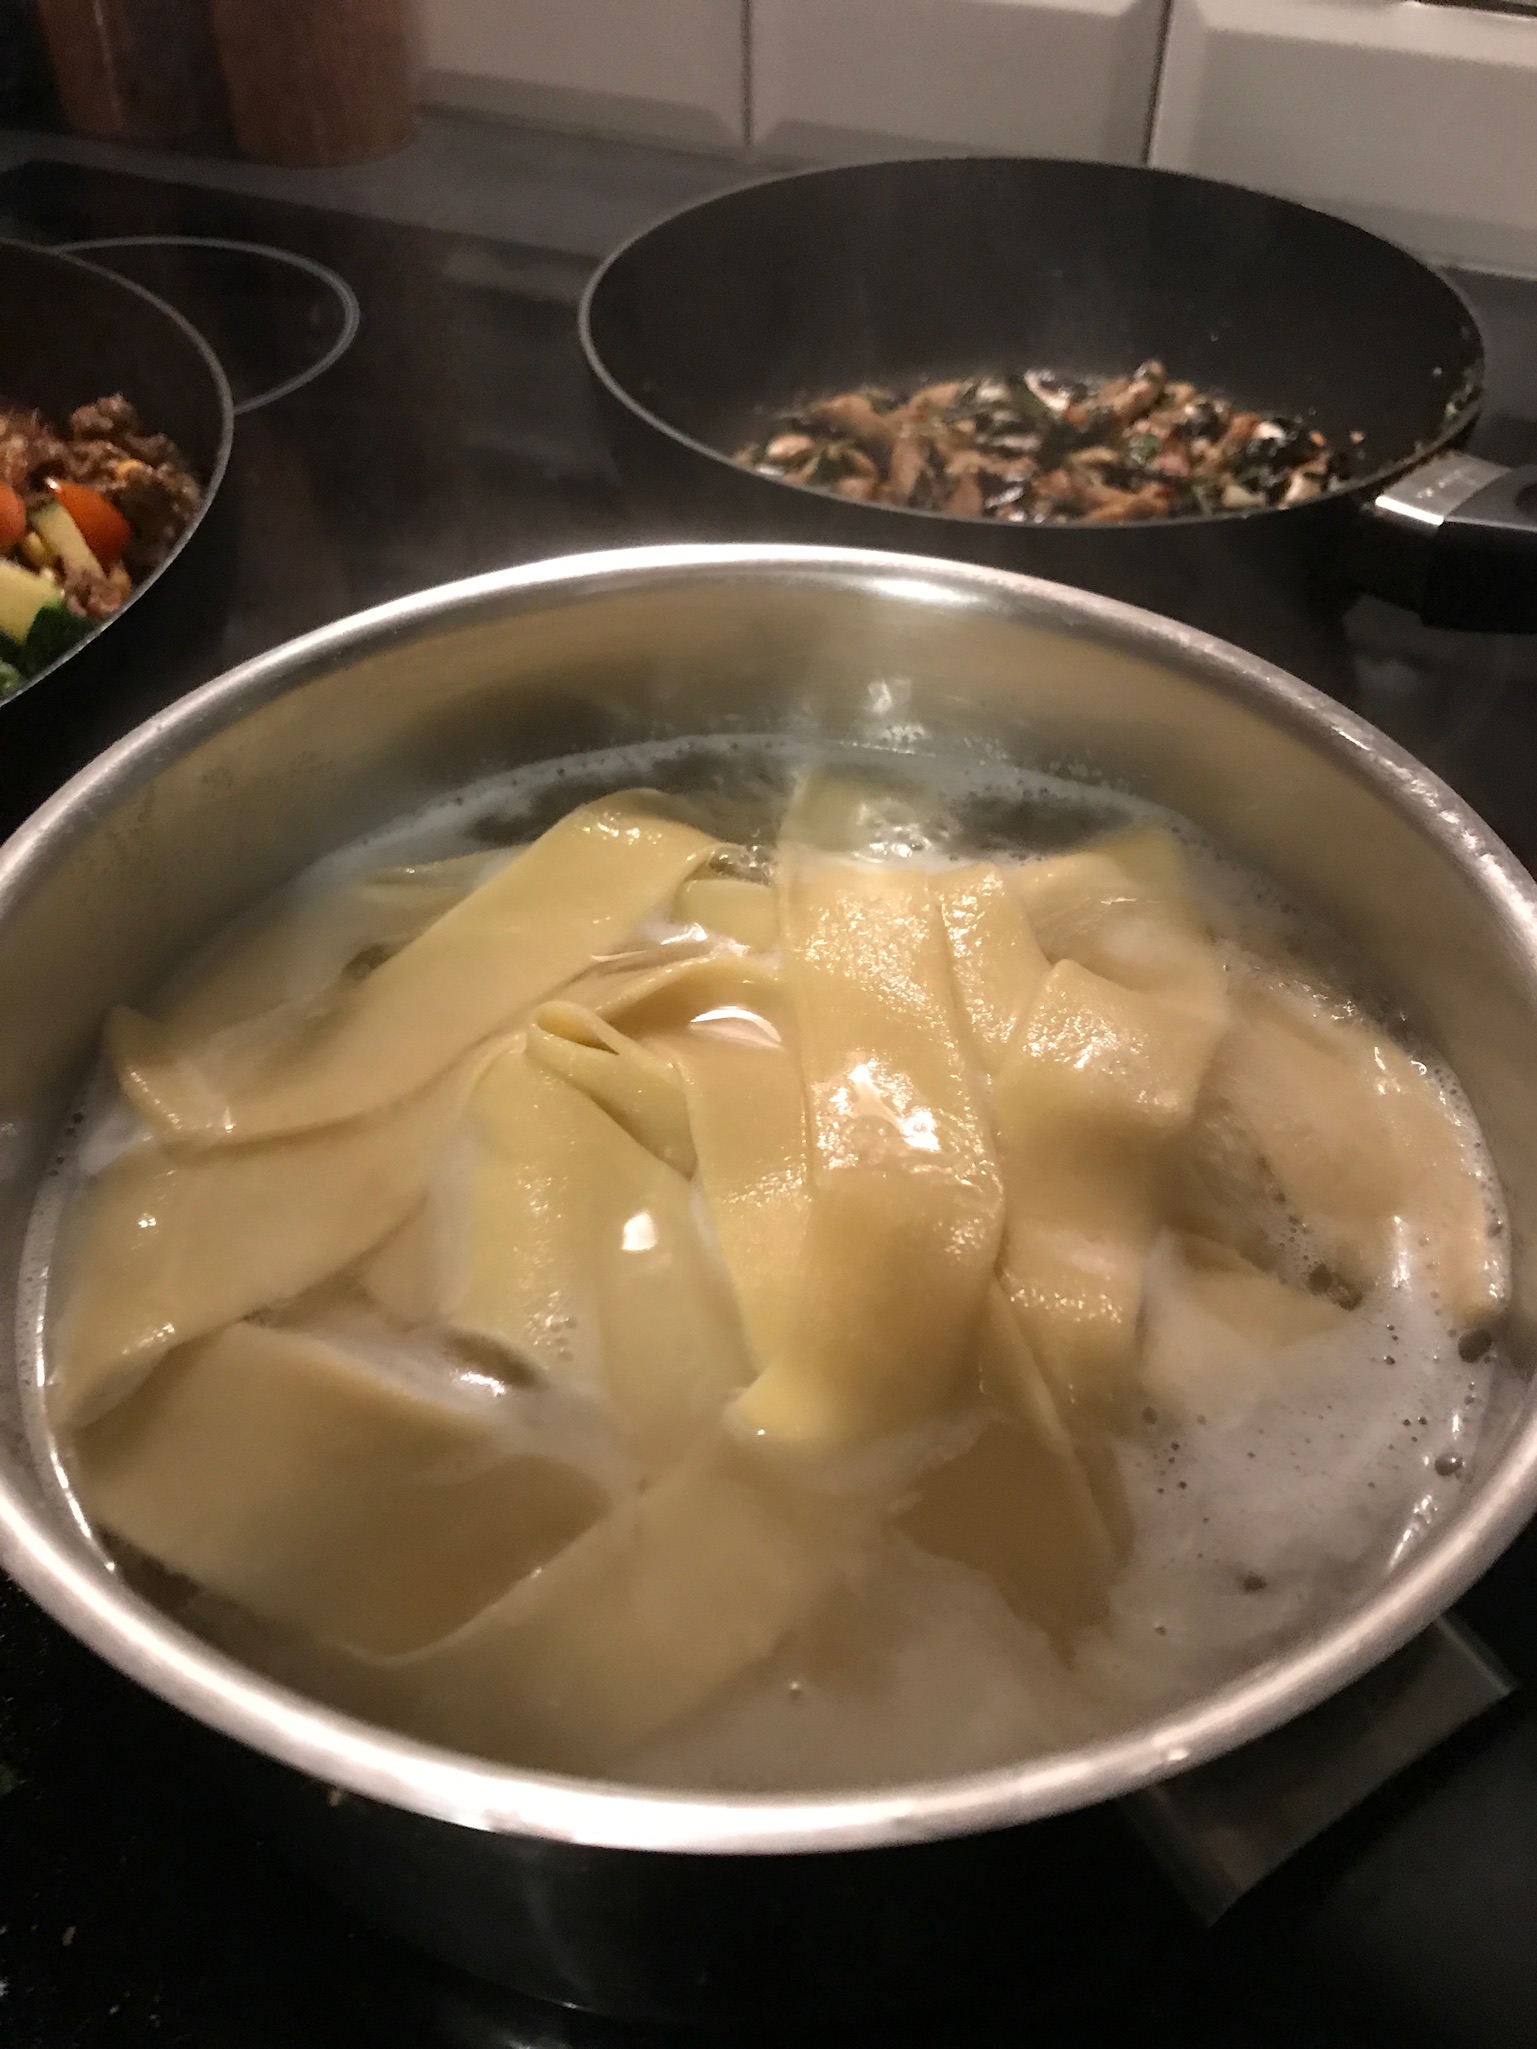
  14. Pop your pappardelle pasta in the boiling water (don’t over crowd) and cook for about 5 minutes but taste as you go until al dente.IMG_0412 2
  15. Mix you tomatoes in with your buttery mushroom sauce.  Drop cooked pappardelle in the fry pan and shake it all together!
  16. Finish with grated parmesan cheese and enjoy with a delicious glass of wine if you are of the non-pregnant variety…Note – there was enough pasta to feed us for 2 nights – we just rolled the left over uncooked pasta into little nests, sealed them in a container and put them in the fridge for the next night – pasta cooks in 5 minutes!  I believe you can freeze fresh pasta (it’s never lasted that long in our house) but would be a great way to save time and have a fancy meal!IMG_0377

A nearly #wastefree meal

  • Flour came in paper that we recycled. Will plan to purchase flour from bulk whole foods store when we next run out and store in glass jar.
  • Mushrooms packaged in paper bag which we recycled – I’m not sure why when we had our calico mini bags at the markets…habit I guess!
  • Eggs in a paper carton I saved thinking I might be able to sew seeds in it for the veggie patch?
  • Oil in a large glass jar we’ll continue to refill and recycle at the end of it’s life.
  • Butter paper I washed, dried and saved for making into muffin tray liners
  • Baking paper to cook tomatoes on – washed, dried and reused (you’re not meant to recycle this as it’s coated in silicone).  I’ve recently replaced our usual brand with ‘If You Care’ parchment paper which is unbleached, chlorine free and totally compostable.
  • Parmesan came in a soft plastic bag we had in freezer.  When this runs out we will take a beeswax wrap to the deli section and purchase a chunk of parmesan not covered in plastic. This bag will go to Redcycle when we finish it.  The parmesan is a bit of a #wastefail but I’m choosing to look at these things as something we are working towards changing and trying not to be too hard on myself! You have to start somewhere!

Keeping Tom caffeinated (whilst valuing farmers and the Earth)

The business of caffeine in our household is very serious business indeed.  We spend quality time making coffees together and drinking them together and it’s become part of our family’s tradition.  We also love being able to bless visitors with a good cup of coffee when they arrive in our home.

Tom is a total coffee snob and I’m not too far behind him.  Thankfully a love language we both share is coffee – Tom loves making them for me and I feel loved when he makes them for me.  In the mornings, Tom usually rolls out of bed early to let the dogs out before they wake the neighbourhood.  On the way past the kitchen, he hits the coffee machine power button on and I hear one of my favourite sounds for the day – the rumble of the coffee machine warming up.  Knowing some awake juice is coming my way is a great incentive to wake up – although sometimes Tom has to stick it right under my nose…

Side note: I’m under no illusion that this kind of wake up will ever happen again once the baby is here…so I’m going to enjoy it while I can! And for the concerned midwives reading at home – no I do not exceed the recommended daily intake of caffeine for pregnant women 😉

For a daily ritual such as this, we think it’s important to think about whether we are valuing people and the environment by doing this?  Here’s a few tips to make your daily coffee an even more positive experience!

  1. Make coffees at home.  This forms the basis of all the other tips really.  Making coffees at home saves waste but it also saves money – plus you don’t have to risk getting the dodgy barista at the work café! We make approximately 14 coffees a week at #thelittlegreycottage.  We purchased a Breville Infuser and a Smart Grinder Pro 3 years ago in an end of financial year sale.  I can’t remember what we bought it for, but they currently retail for about $900 together. $900.00 / 156 weeks = $5.77 a week or $0.41 per coffee to enjoy a reasonable quality home espresso machine and grinder.  This cost will obviously decrease the longer we have the machine.
  2. Buy fair-trade coffee beans. Our favourite local roaster has just shut down so we have been looking for an alternative place to purchase our weekly coffee beans.  We buy weekly as ‘fresh’ beans are best – that is 4-7 days post-roasting and they are really at there peak for only a week or two after that).  We have just started looking into a coffee subscription with Toby’s Estate where we can purchase their Fair Trade and Organic beans for $13 a week including delivery to our home.  Ethical beans are important to us, because people are important to us. A Fair Trade certification guarantees that farmers receive fair prices and that working and living conditions are safe for employees (plus many other benefits for the whole community). World Vision Australia have a list of Fair Trade coffee brands here and Fair Trade Australia have a list here.

 $13.00 / 14 coffees = $0.92 per coffee to enjoy ‘happy’ coffee beans from valued farmers.

  1. Buy local milk. We are hardcore Maleny Dairies fans and only drink the fattiest, tastiest milk you can buy (sorry Mum!).  We value the incredible work of local farmers and we want to make sure they get the right price for their amazing product.  We purchase 2L of Farmers Choice direct from the family business at our local farmers’ market every week (and often some delicious yoghurt too!). You have to give this milk a good shake up before use to disperse the golden cream throughout. We then recycle the milk bottle and cap after rinsing them out.

Approx $5.00 / 14 coffees = $0.36 per coffee to enjoy premium milk and support a local family business (low food miles too!).

  1. Use reusable cups. Usually we drink our coffees at home so just use ceramic or glass cups, however we also have 8 oz glass Keep Cups for when we drink out (in our opinion the glass ones make the coffee taste so much better!).  I dropped mine on the driveway the other day and it smashed into a billion pieces (and irritatingly you cannot recycle broken glass in Brisbane City Council – although this is probably for safety reasons).  Then I ‘stupidly’ recycled the lid, only to find out a few days ago you can buy replacement parts!  So now I’m in the market for a whole new one. I still need to get much better at remembering to actually take my Keep Cup places! I blame pregnancy…

  1. Compost your grounds. Now that our compost bin is up and going for the second time (read about the fate of our first one here), we dump our used coffee grounds in our compost heap at the end of each week.  Used coffee grounds add nitrogen to your compost, improve drainage, attract worms and stops them from ending up in landfill where they would take a lot longer to breakdown. Following these 5 steps means that we not only prioritise people and the Earth in our daily habits, but we also save money.

Each coffee costs approx. $1.70, saving us approximately $2.30 a coffee, $32.20 a week and $1674.00 a year!!

And here’s a freebie…

  1. Drink mindfully and spend time with your loved ones. The simple act of sharing a coffee with someone can be a truly meaningful experience for both parties.  Don’t underestimate the power of a simple hot drink and a listening ear.